In this article, I'll be detailing the installation of Windows on your Mac, tools for accessing your files on the Windows disk and finally how to configure internet and mail so that you can reuse your bookmarks, Web settings and e-mails on both sides. Note that the last part also works for sharing Web settings and mail between other operating systems (for example, Linux and Windows).
INSTALLING WINDOWS ON YOUR MAC
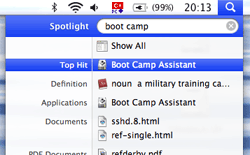
 Ever since Macs started using Intel processors, Apple has started providing tools for installing Windows on Apple hardware. The software is called "boot camp" and is provided with macOS starting from Leopard. To launch boot camp, just click on the spotlight and look for boot camp. The Boot Camp Assistant will show up in the list, click on it and follow the instructions. If you cannot find it, just download and install it from www.apple.com/support/bootcamp.
LIMITATION: Boot camp currently doesn't let you create multiple partitions. You therefore can have only two partitions in total: macOS and Windows. It is very difficult to have a third partition for your documents.
TIP: Since you can access your Windows disk from macOS (but not the inverse), I'd recommend you to keep your personal files and documents in the Windows partition. Therefore, it would also be wise to give more disk space to Windows.
TIP: One deduction you can make from the tip above is that you need to leave enough space for macOS, for Windows and for your personal files and documents. As an example, on a 512 GB disk, I would recommend 100 GB for macOS, another 100 GB for Windows and the rest for personal content - So, when splitting your disk into two in Boot Camp initially give 512 - 100 = 412 GB to Windows.
TIP: Once Windows is installed, if you want to choose which operating system to start, simply press the OPTION (or, if you have a PC keyboard, the ALT key) key when your computer is starting (start pressing just after you power up, keep pressed until the choice screen shows up).
CREATING THE THIRD PARTITION
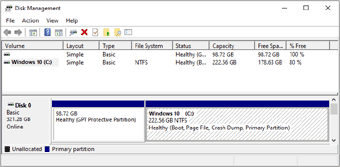
 Once the Windows installation complete, you can use Windows' Disk Management tool to create the third partition (in other words, the one where both Windows and macOS have full, native access): right click on your Windows 10 drive in the Disk Manager and select Shrink Volume to reduce the size of the Windows 10 partition to 100 GB. Then, another right click but this time on the newly created empty space, and select the New Simple Volume option to create a new partition in the exFAT format, that macOS and Windows will easily read and write to without requiring any third party tools.
TIP: Many file links, for example the ones you'd create in Firefox, start with D: (or whatever disk mount point you gave in the previous step) in Windows; but in macOS C: is called "/Volumes/DATA" (or, whatever name you decided to give to it). To fix this issue, create a symbolic link: open up a terminal, type cd / and then sudo ln -s Volumes/DATA D: (this will create a symbolic link [i.e. a shortcut], called D:, that goes to /Volumes/DATA and hence allow your Windows shortcuts to work on macOS).
USING THE SAME WEB AND MAIL ON BOTH SIDES: MOZILLA SUITE
 An extremely annoying problem any multi-operating-system user has in information sharing. By default, your browsers on Windows and macOS will not be sharing bookmarks or cookies, neither the mail clients be sharing e-mails (Internet Explorer and Safari will each keep their own settings, the same for Outlook and Apple Mail, etc. If you're lucky, they'll let you import once, but never get resyhcnronized...); in most cases you need to synchronize manually.
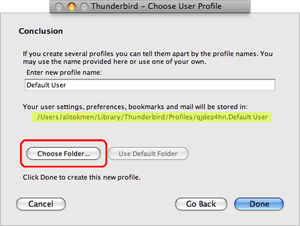
Mozilla, www.mozilla.com, offers great products that do not suffer from these issues if configured properly (you can therefore have the same Internet settings, bookmarks, e-mail accounts, etc. on macOS, Windows and Linux). You probably heard of their wonderful browser, Firefox; as well as their easy-to-use mail client, Thunderbird. Both of these products have a "Profile Manager". Using this option, you can tell the Firefox and Thunderbird installations on your Linux, macOS and Windows installations to share the same profiles. Note that all these products are free and open source.
On Windows: